
How Tos:
Quick Start
Overview
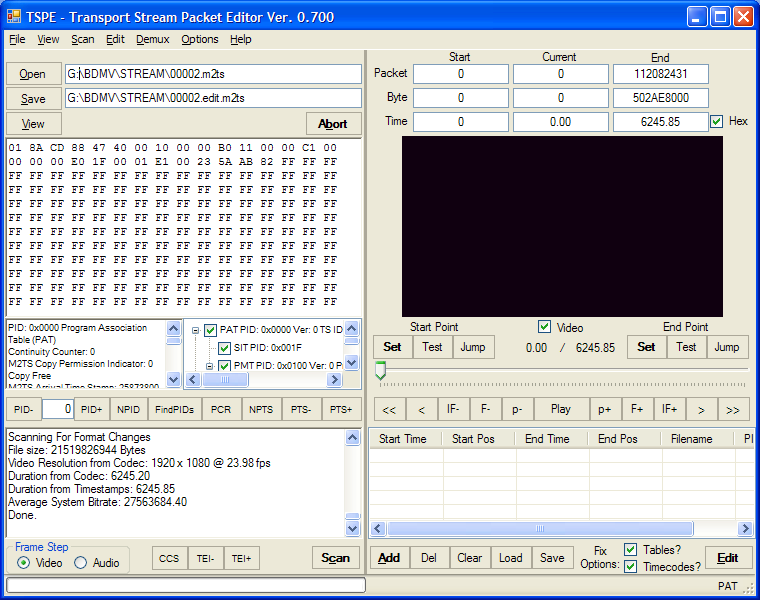
The main screen is split into 4 main parts:
- Decode and Analysis Windows
- Status Window
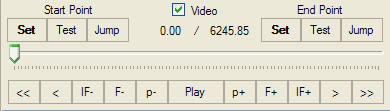
- Video Preview and Navigation
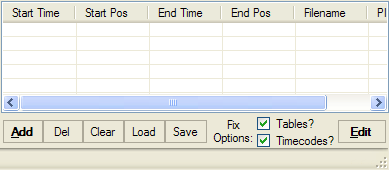
- EDL (Edit Decision List)
Load a file
- Drag and Drop a Transport Stream file into the Video Preview window
- Or use the Open Button to select a file
- Click on the Save button to change the name of the output file or edit the Save As textbox

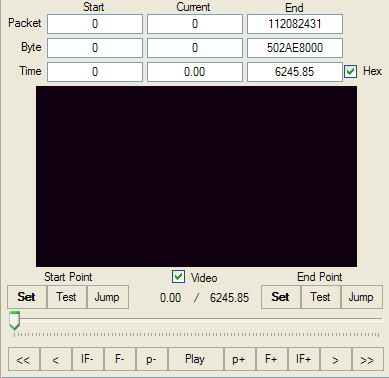
Set An Edit Point
- Use the Navigation controls to find a suitable Start or End Point
- "<<" & ">>" Jumps approximately 10 seconds
- "<" & ">" Jumps approximately 1 second
- "IF-" & "IF+" moves to the next I-Frame
- "F-" & "F+" moves to the next Frame
- "p-" & "p+" moves to the next packet
- "Play" will play the Transport Stream and turn into a "Pause" button
- The Trackbar can be used to "Scrub" the stream for fast previewing
- Cliicking either side of the pointer will jump approximately 60 seconds
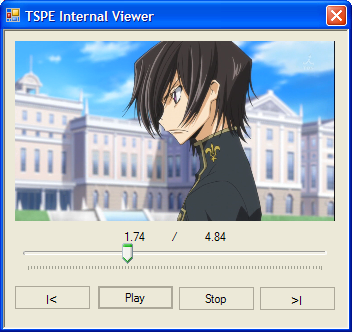
- Click the "Test" button to check the start / end point is correct
- The Internal Viewer will launch to preview the edit point
Make an Edit
- Set the Start and End Points
- Click the "Add" button to add your start and edit points to the EDL (Edit Decision List)
- Repeat 1 and 2 above for all your edit points
- You can move edit lines in the EDL window by dragging and dropping the line to it's new location
- You can delete a line in the EDL window by selecting it and clicking the "Del" button
- Once all your edit points have been set, Click the "Edit" button to begin the edit
- The status window will display the progress of the Edit
- Once finished, the Internal Viewer will launch so you can check your edit
Analyse
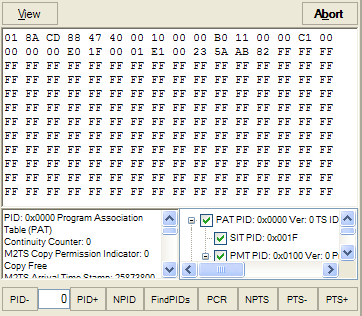
- Click the "View" Button to rotate the Decode and Analysis Windows
- The Decode and Analysis windows are:
- Hex Display
- PID Tree
- Decode Window
- The buttons below are:
- PID +/- buttons - These move to the next PID in the PID text box. You can edit the PID in the text box
- NPID button jumps to the next different PID from the current PID
- FastFindPIDs button quickly rescans the file to find the PIDs and any attribute changes
- PCR button moves to the next packet carrying a PCR
- NPTS button moves to the next packet carrying a PTS
- PTS +/- buttons move to the next packet carrying a PTS for the specified PID in the PID text box
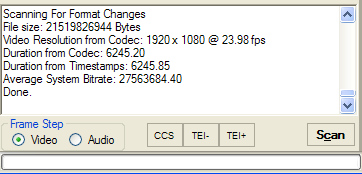
- Below the Status Window are some buttons for scanning for specific types of error:
- CCS button scans for the next continuity error for the PID specified in the PID text box
- TEI +/- buttons scan for the next packet with a TEI (Transport Error Indicator) error
Scan
- Load a Transport Stream
- Click the "Scan Button"
- TSPE will scan for the following:
- Timestamp Gaps in PTS, PCR, DTS
- Continuity Counter Errors
- Packets with TEI Error Flags
- If any of the above errors are found, their position is also added to the EDL list
- Additionally, the status window will report the following:
- PID list
- Missing streams
- Elementary Stream Attributes
- Timestamp Wraparounds
- The scan results are saved to a file in the output folder with a .log extension